Prerequisites
This part of the tutorial assumes that you have:
- Already completed Part 1 of this tutorial, including its prerequisites.
- Download the CodeGenHero.Template.Blazor6.cghpkg CodeGenHero Blazor Template Bundle file.
Getting started with CodeGenHero
Now that you have the custom project templates installed, let's put them to use by scaffolding out a multi-tiered solution. We will use this solution in the next part of the tutorial to generate code.
- Make sure you have your ArtistSite solution open.
-
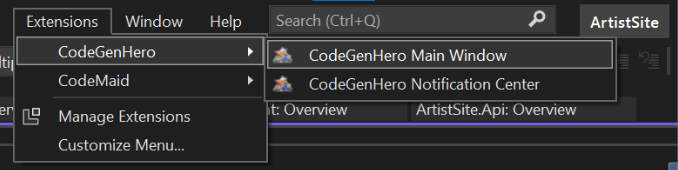
Now that we have the CodeGenHero extension installed, we want to open up its main window.
Click on the Extensions | CodeGenHero | CodeGenHero Main Window in the menu.
-
In the CodeGenHero window, you will be prompted to log in under “Already a Hero?”
If you have not done so already, makes sure that you confirm your email using a link sent to you after registration. Then, enter the credentials you used when registering on the CodeGenHero. -
Single-click on the MSC.ArtistSite.CodeGenHero project to select it so that it is highlighted.
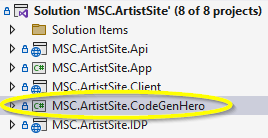
Then, click the Set CodeGenHero Project button.

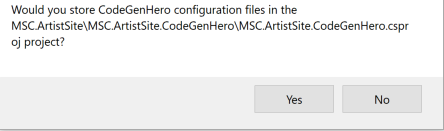
This action instructions the CodeGenHero extension to store the configuration files it uses, such as metadata and blueprint files, in this project.
Click Yes to confirm that you do, indeed, want to store the configuration files in this project.
-
Once this is done, the Metadata tab will activate.
Click the Next Step: Metadata button in the bottom-right of the CodeGenHero window to continue.

Metadata
Generating code relies upon something called metadata. In the case of CodeGenHero, that metadata is derived from a relational database. In this section, we will walk through how to create the metadata source that works with CodeGenHero templates.
-
Click the Create New button near the top of the Metadata tab

-
Click the New button in the Create Metadata Source window that opens.

-
In the Connection Properties window that opens, enter your server name, authentication details, and the name of the database on the server you wish to use.
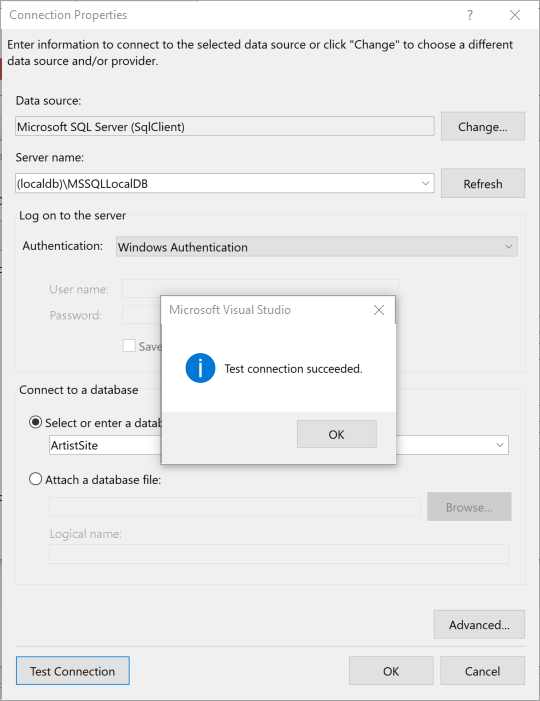
Your server name will be (localdb)\MSSQLLocalDB”, if you are following along from the previous part of this tutorial.
Likewise, we can use Windows Authentication and the database name is ArtistSite. Click the Test Connection button to confirm everything works and then click the OK button when you are done. -
In the Create Metadata Source window, review the generated default settings.
Here you can make changes to the namespace that will be used for Entity Framework classes as well as the name for the DbContext class itself. You can also give this metadata source a name and description to differentiate it from other metadata sources you may have in a solution.
We will only have a single metadata source in this tutorial, so the default values are probably fine.
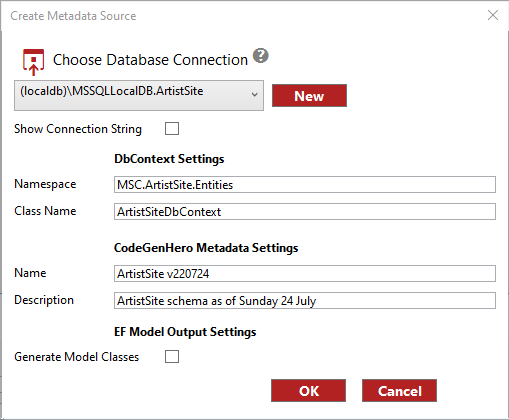
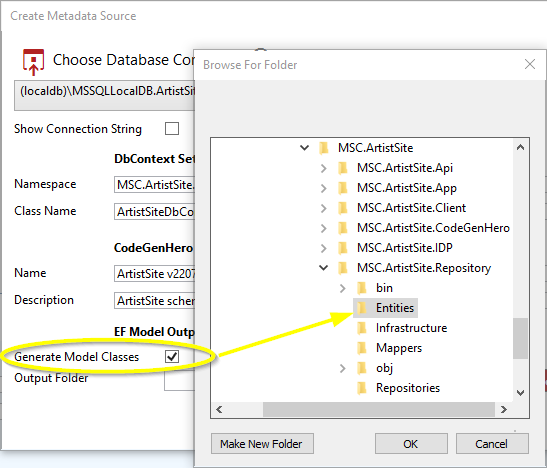
Make a note of the DbContext namespace and Class Name you chose. We will need these values later in the tutorial. - Tick the checkbox for Generate Model Classes
Click the Choose Output Folder button and navigate to set a value of the Entities folder of the Repository project. Depending on the folder location where your solution is located, you should end up with a value that is something like "C:\Users\<YourUserName>\source\repos\MSC.ArtistSite\MSC.ArtistSite\MSC.ArtistSite.Repository\Entities"
Click the OK button at the bottom of the Create Metadata Source window.
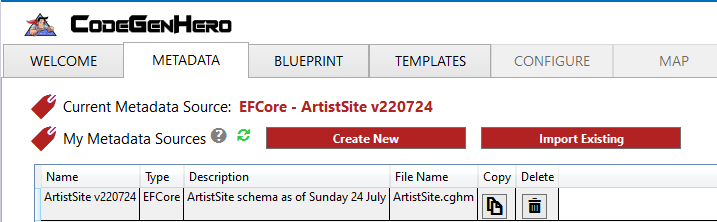
Wait a few seconds while the tool analyzes the database and generates a DbContext class and entity classes that are compatible with Entity Framework. After some time, a new entry should appear in the My Metadata Sources grid.
-
Now that we have metadata, the Blueprint and Templates tabs should become enabled.
Click the Next Step: Metadata button to continue.

Blueprint
Next, we will change the name of the Blueprint file that is generated by default. For context, Blueprint files are used by the CodeGenHero extension to store settings such as which of the available templates are selected for code generation as well as parameter values for those templates.
- Click on the row containing the Sample Blueprint item in the My Blueprints table.
-
Edit the Name and Description fields in the Edit or Create Blueprint section to be
"ArtistSite Blueprint" and "Blueprint for ArtistSite code generation", respectively.
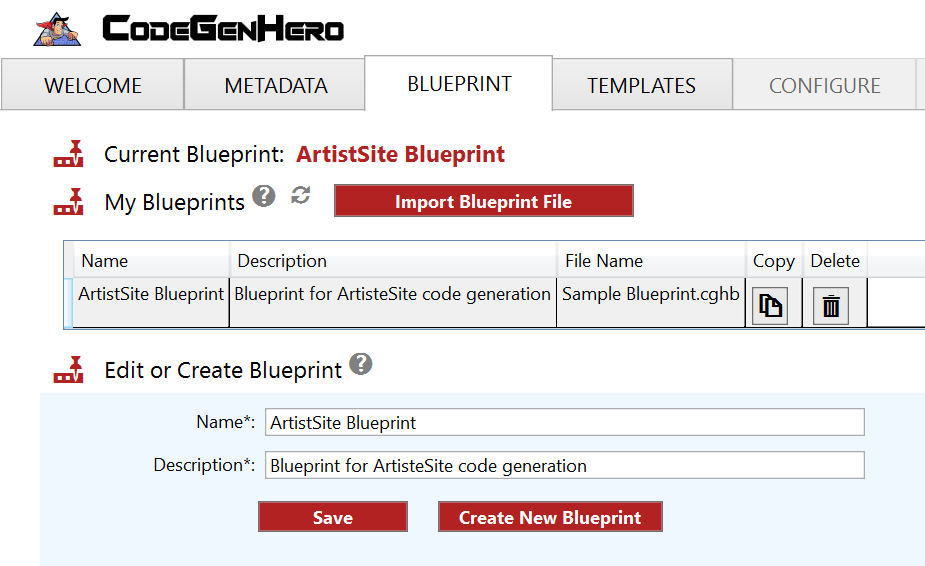
Click the Save button. -
Click on Next Step: Templates to navigate to the next tab where we will load and select templates to generate.
